Finished Builds
& Past Projects
First of all, thanks so much for your interest in checking out my work!This just highlights my finished projects; you can always check out my Instagram for rolling updates or join my discord for all the nitty gritty.Feel free to click/tap on any of the images here to jump to a build, or scroll past and enjoy each of them one at a time :)


SHAVARK
CUSTOM STAGGERED HEIGHT CHOCWA BAR
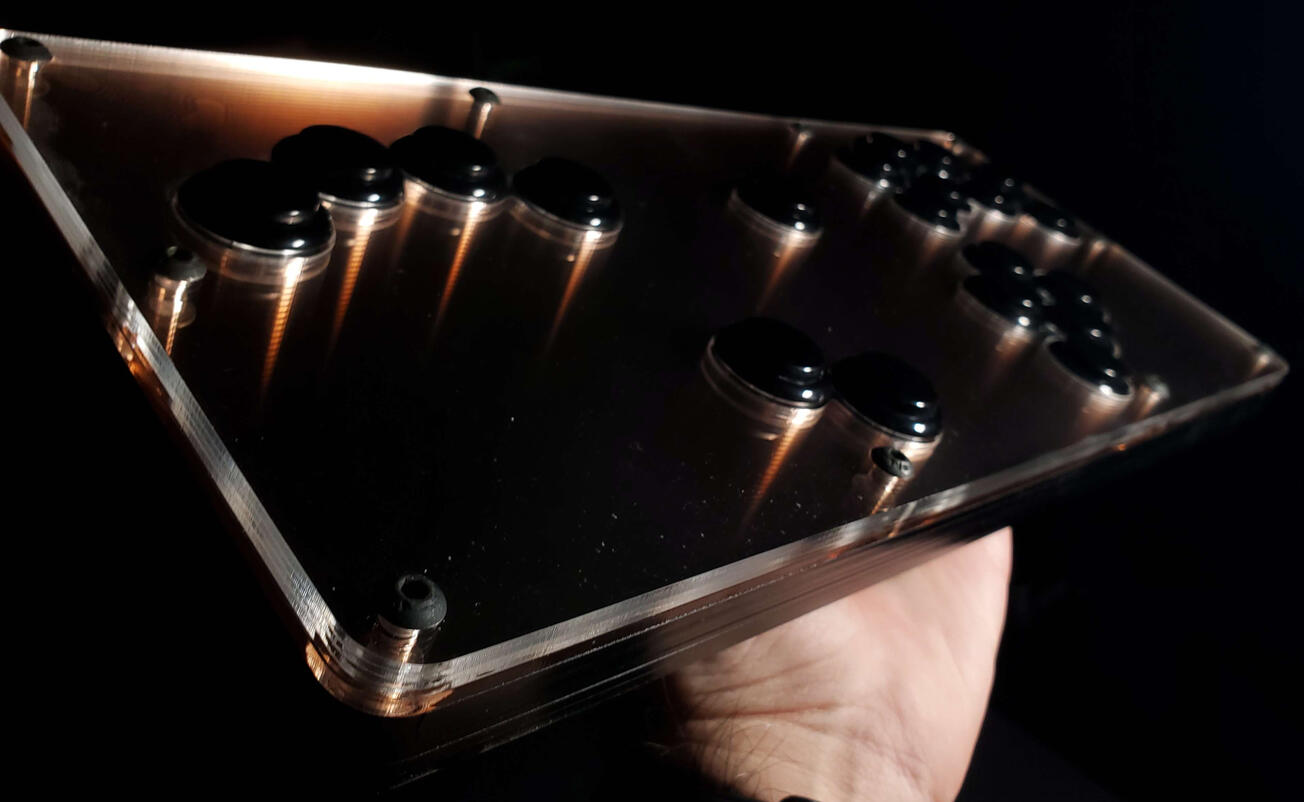
Hoo wee. This build really pushed me to my limits on a number of fronts, and it took a lot of thinking to figure out how I could accomplish what Shavark asked me to do. As a man well versed and weathered with 20 button controllers like these for Melee, he came to me with only one goal: To make him the shortest possible travel distance buttons I could manage. It's not perfect, but I'm proud of what I managed to make him.


The ways this build pushed me... man.
I normally use 3D printed shims to reduce travel, and print them in two 0.2mm layers for a nominal travel reduction of 0.4mm. BUT, WOULD YOU BELIEVE IT, theory rarely carries out in practice; the tolerances from shim to shim mean in practice the reduction is 0.4mm-0.6mm, and then add to that the travel distance and actuation from each switch varying too... and what you get is a nightmare to try to control for to really push the total travel reduction to its limit.
So I reached out to another modder, Ricebowl, for some help coming up with a solution. He's been using a Cricut to do travel reduction mods of his own on arcade buttons, and he cut me a few sheets of stickers that allowed me to control for travel reduction 0.1mm at a time. With those in hand, I was able to PRECISELY reduce travel in each 25g switch by 1.0mm; any further and I was worried I'd run into tolerance issues (which I still did on two of them). Each switch took 10 stickers on each side.... so it was a multiple hour effort for that work alone.
Then I put together a little map using quick sketched representations of the buttons for Shavark to review and we put them all in the spots we wanted them based on their individual characteristics. (That's what that last pic is). You can see how much they vary from each other, despite my best efforts with the calipers and working extremely slowly.
It's also super hard to tell, but Shavark also asked for me to stagger the button height between the upper and lower rows of the right hand clusters, and I managed that by splitting the top 3mm panel I normally use into 3 1.5mm panels to accomplish that height difference. It cost a ton in special order acrylic and I needed to order in longer bolts for it, but I'm way proud of the solution I came up with.
The resulting controller is whisper quiet, and takes the most delicate touch to play on; with springs so light and travel so short, it is punishing to play on lazily as you'll get lots of misinputs and accidental presses. The variation from one button to the next also means there's a little bit of lag in relearning when to expect an input to register when you first pick this controller up, but after only about a half hour you settle into a groove and your hands feel very little of the wear they do if you're a heavy handed monkey like I am on my Frame1 Heavy :)
All in all, thank you Shavark for presenting me with such a unique challenge, and for being so forthcoming every time I came to you and asked for more money to cover costs and labor that cropped up. Not to mention how long it took me to get things done with how hard I tripped over myself mentally.
Needless to say, this one is absolutely a one off - I'm not doing a build this way ever again LMAO
EBIN
CUSTOM OFOF1 BUTTON CHOCWA BAR MINI
This one ended up kinda happening on a whim; I wanted to try using the way cool 3D printed resin buttons designed by Rana Labs for the OFOF1 project in a build, partially as an experiment to see how they felt as drop in replacements for standard arcade buttons and to see whether they would be faster to build with and cheaper. In short, yes they would but I made it way harder for myself :') (See note at the bottom)


When the buttons came in from JLCPCB, they had this really chalky texture to them that I frankly thought was actually pretty nice. I was plugging along with the build until someone cursed me by suggesting that I try polishing the buttons.... so, I did a test, and I liked it so much that I polished all of them. So much for easier and faster, it took me multiple days to get them all done LMAOI used Gateron Pro Silver switches in this one, with a little piece of plumbers tape on the stem of each switch to make sure the caps don't pop off over time as I've seen many other people show the resin buttons tend to do. Beyond that, it's a Chocwa Bar Mini with a handmade cable and my usual fussy wiring.The buyer though, Ebin? He is a mega homie, and it was his futzing around with my initial ideas years ago that got me to start rethinking how to tackle buttons, and ultimately led me to the whole Chocwa mod. He even wrote me a whole ass review for this controller, bless him. Thanks for being a homie Ebin, and I hope this thing serves you well for all the games you'll ever play <3NOTE ON THE BUTTONS: The OFOF1 buttons are SLIGHTLY bigger than 24mm so they aren't actually a good option for drop in replacement; to that end, Rana Labs collaborated with TheTrain on these absolutely awesome buttons and PCBs that take the idea of those original buttons to the next level. Use them instead!
KNOWM4D
PASTEL BLUE CHOCWA BAR
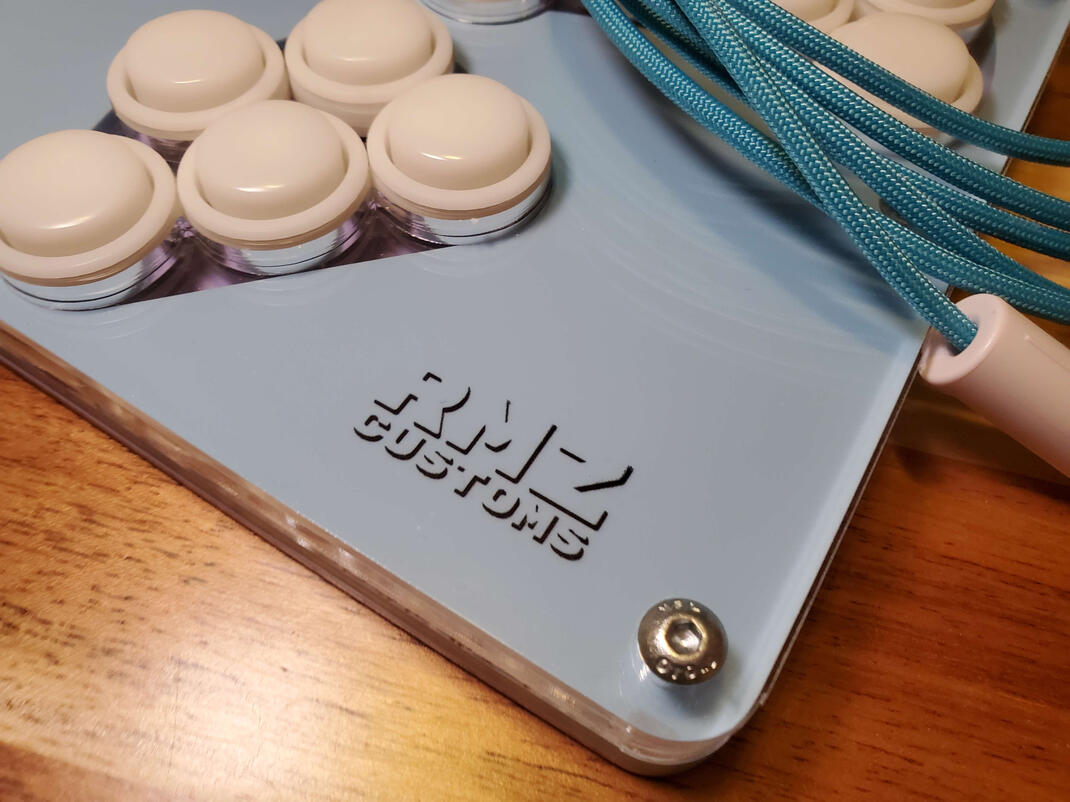
Knowm4d came to me knowing only one thing: that they wanted a rectangle. After some discussion and explaining the concepts that played a part in the design of a build, Knowm4d went and did some research on the options available before coming back to me and said "you actually just have the best designed box currently available".And, well, I don't know if I'd go that far, but I think it came together pretty nicely in the end :)


This one was a fun one; I had planned out the material in advance, and the soft touch pastel acrylic just has such a wonderful flat look to it and feels great on the skin. Getting to talk with Knowm4d about aesthetics though, they got REAL excited about the prospect of mix and matching sanwa parts, so even though my original plan was all white buttons, we got to scheming and landed on the white rims and violet plungers. Now that it's delivered, Knowm4d was popping off about being finally play the game again without pain too!As much fun as I have getting all fussy with button mods and making pretty things, it's an important reminder that there are many out there who are limited from playing the game they love due to their bodies, and that these builds help people get to continue to participate. I'm proud of this build and grateful that I was able to be a part of Knowm4d's journey back into playing melee comfortably.#FreeMelee
ZEDA
FLOURESCENT ICE BLUE CHOCWA BAR
Zeda is an avid controller enthusiast, and has tested and collected many controllers over the years. Seeing me talk about my button mods, and consulting with me early on to discuss the Chocwa mod and its merits vs the 20MX mod he had installed on his B0XX, he decided to take the chance to make something special with me.


Zeda and I juggled a number of ideas early on, but eventually settled for a very simple aesthetic; Flourescent Ice Blue acrylic, and white everything else. We investigated getting custom white usbc breakouts and picos and found they would be nauseatingly expensive, so as a last resort I decided to try painting the two PCBs... with spray paint. Miraculously, it worked out great and the controller looks all the cleaner for it! With special ordered white Chocwa PCBs, blued case bolts and all white wires, it's truly something to behold. The signature/logo was his idea, and I'm glad he requested it because nestled inside the layers it makes the whole thing far classier than it has any right to be.Yes, it'll be a fingerprint magnet, but neither of us care :)
Sixtalez
CUSTOM PRINT & LAYOUT CHOCWA BAR
Six is a fixture in the Toronto melee scene, keeping events alive in a post covid world and being part of the engine that brought us the hype fest that was GOML 2022. More importantly to me, he's another builder and a good friend I made while learning how to build and developing skills that got me here today.


This build was special to me and the art on the bottom is my love letter to Crane's Lab, the discord community where I and so many other cut our teeth and pass that knowledge on to newcomers. He gave me full creative license with the design of this build, and I'm super proud of how the top panel came out. I called the bottom panel "art", but really it's the culmination of years of inside jokes... which I guess is its own kind of art in a way?
Whatever; if you know, you know ;)
PINKY
CUSTOM PRINT CHOCWA BAR
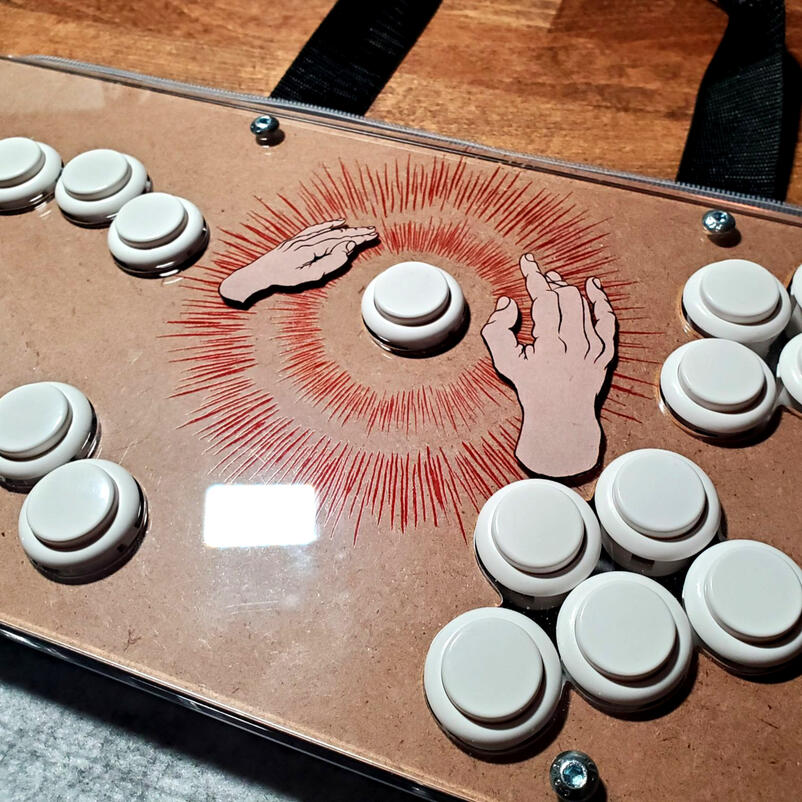
Clem (Pinky) was one of the first few people to see my vision for a new way of doing buttons, and was on board right from the beginning. The vision for adapting the album art from GY!BE's Raise Your Skinny Fists was entirely Clem's, and I am absolutely in love with how true to the original art it ended up being.


Clem made the push for the layer of MDF to match the original album's paper sleeve, and also did the work of separating the hands and the lines from the original art to allow us to do a layered print for a truly unique effect. Really exciting project, and Clem's vision made for great rapport as we made it a reality.
POPPINFRESH
CUSTOM PRINT & LAYOUT CHOCWA BAR MINI
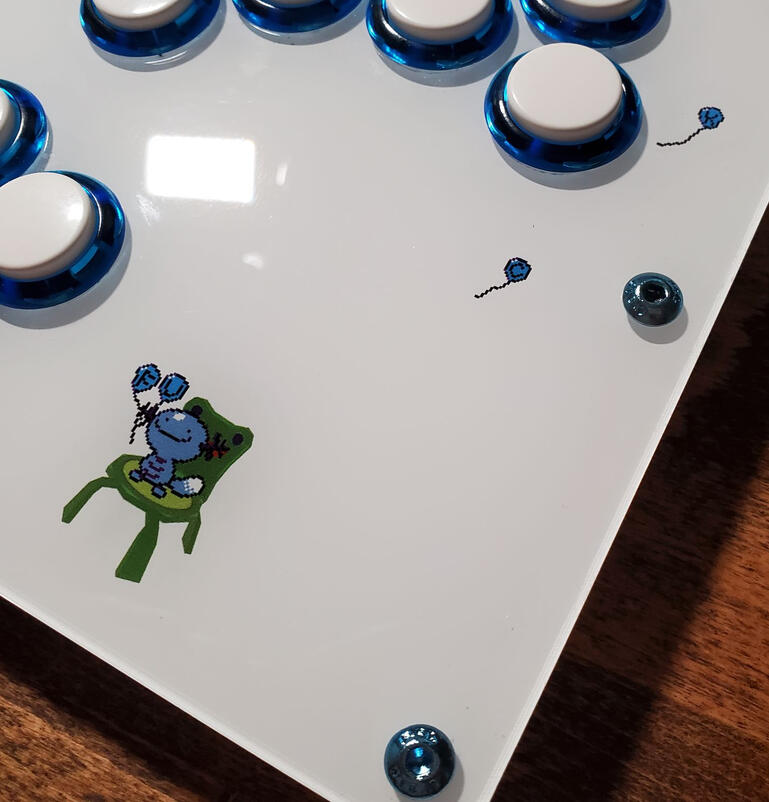
Poppin was one of the first to see what I wanted to do with my controllers, but came to me with the very unique challenge of designing something that was not only as compact as possible, but tightened the button positioning to accommodate for his hands. It ended up becoming the template I altered to design what I standardized as the Chocwa Bar Mini:


Poppin did a ton of the legwork of splitting the original Wind Waker wallpaper into two separate images, which I cleaned up and arranged to get the lovely parallax effect that the art provides. The button colour combinations had me hesitate early on, but I really think they suit the art well once all was assembled in front of me! Poppin was supremely patient and understanding of the process of creating this controller, and really pushed me to make good on all the claims I made, and for that I'm grateful for their faith in my ability.
Need more?
I'm keeping this gallery page neat and tidy, dedicating it to completed projects so as to showcase my "production" level work. That said, I'm hardly secretive with build progress pics; of course, you can join my discord to see what I'm up to at any given moment, but if you're looking for socials, check out my instagram to see rolling progress pics of whatever I'm in the middle of building!